Welcome to the world of WordPress, where building a website is both exciting and a little daunting for beginners. One critical aspect that can make or break your site’s success is understanding WordPress user roles and permissions. Why does this matter? Whether you’re running a personal blog, a business site, or a collaborative platform with multiple contributors, user roles determine who can do what on your website. From publishing posts to installing plugins, each action is tied to specific permissions, ensuring control, security, and efficiency.
In this Beginner’s Guide to WordPress User Roles and Permissions, we’ll walk you through the essentials: what user roles are, the default roles available, how to manage them, and best practices for keeping your site secure. We’ll also cover how to create custom roles and avoid common pitfalls. By the end, you’ll have a clear understanding of WordPress roles and capabilities, empowering you to manage your site like a pro. Let’s dive in!
Table of Contents
What Are WordPress User Roles and Permissions?
At its heart, WordPress uses a role-based system to control access to your website. A user role is like a job title that defines a set of permissions, known as capabilities, which specify what tasks a user can perform. For example, the ability to publish a post or delete a plugin is a capability tied to specific roles.
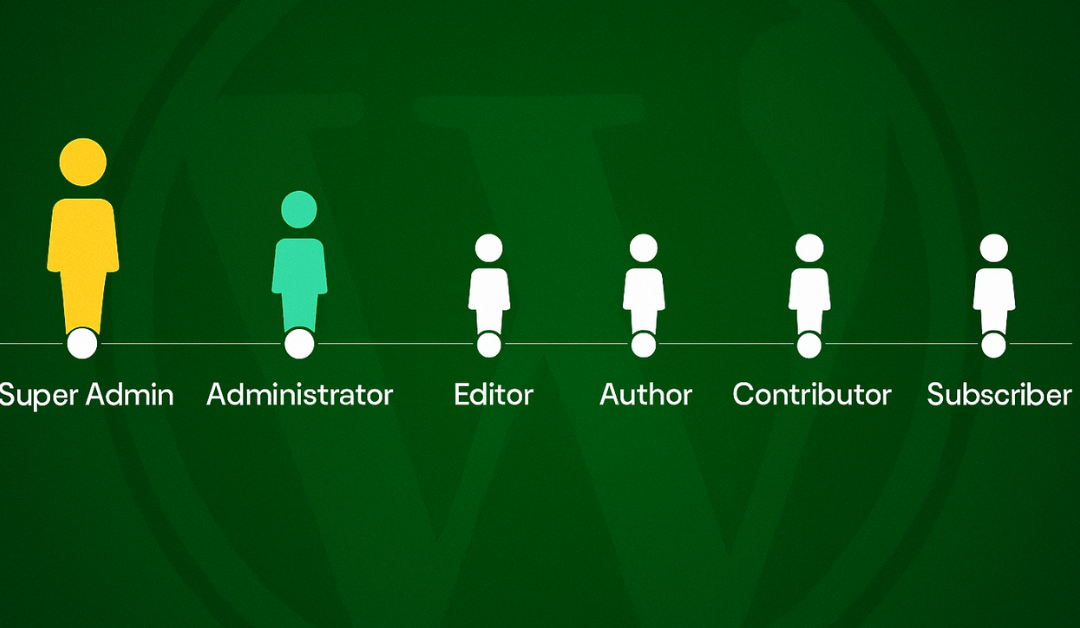
This system ensures that not everyone has equal power on your site. For instance, a guest writer shouldn’t have the same access as the site owner. By assigning roles thoughtfully, you prevent accidental damage, maintain content quality, and protect against security risks. WordPress comes with five default user roles (plus one for multisite setups), but you can customize them for more flexibility. Understanding WordPress user roles explained is the first step to managing your site effectively.
Default WordPress User Roles Explained
WordPress provides five default user roles, each designed for specific purposes. Below, we break down each role, its capabilities, and typical use cases, based on the official WordPress.org User Roles Documentation
Administrator
The Administrator is the most powerful role. Admins have full control over the site, including:
- Installing and managing themes and plugins.
- Updating WordPress core software.
- Creating, editing, and deleting users.
- Managing all site settings and content, including posts, pages, and comments.
Use case: This role is ideal for site owners or trusted managers. For example, if you’re running a small business site, the owner might be the only admin to handle critical tasks like installing security plugins.
Caution: Limit this role to a few trusted individuals to reduce security risks.
Editor
The Editor is the content king. Editors can:
- Create, edit, publish, and delete any posts or pages, even those created by others.
- Manage categories, tags, and links.
- Moderate comments.
They can’t, however, change site settings, themes, or plugins.
Use case: Perfect for content managers on a blog or news site. For instance, an editor at a lifestyle magazine site might oversee all articles, ensuring they’re polished before publishing.
Author
An Author focuses on their own content. They can:
- Write, edit, publish, and delete their own posts.
- Upload media files (like images for their posts).
They can’t edit others’ posts or manage site-wide elements like categories.
Use case: Great for regular contributors, like guest bloggers or columnists. For example, a tech blog might have multiple authors writing reviews without interfering with each other’s work.
Contributor
A Contributor is a junior content creator. They can:
- Write and edit their own posts.
- Save drafts.
However, they can’t publish posts or upload media, requiring an editor or admin to approve their work.
Use case: Ideal for new team members or community submissions. For instance, a community blog might use contributors to submit drafts for review before going live.
Subscriber
The Subscriber is the most limited role. Subscribers can:
- Log in to the site.
- View content (including private posts, if permitted).
- Update their own profile.
They have no editing or publishing powers.
Use case: Best for membership sites or forums where users need access to restricted content but shouldn’t make changes. For example, a course platform might use subscribers for students accessing lessons.
Note: In multisite WordPress setups, a Super Admin role exists, granting control over the entire network of sites. For single-site users, the above five roles cover most needs.
WordPress User Roles and Their Capabilities
To truly grasp WordPress user roles and capabilities, let’s look at the specific permissions tied to each role. WordPress has over 80 capabilities, ranging from `publish_posts` to `manage_options`. Here’s a simplified comparison of key capabilities:
Administrator:
- `manage_options`: Change site settings.
- `install_plugins`: Add new plugins.
- `create_users`: Add or delete users.
- `update_core`: Update WordPress software.
Editor:
- `edit_others_posts`: Edit posts by any user.
- `publish_pages`: Create and publish pages.
- `moderate_comments`: Approve or delete comments.
Author:
- `publish_posts`: Publish their own posts.
- `upload_files`: Add images or files to posts.
Contributor:
- `edit_posts`: Edit their own drafts (no publishing).
Subscriber:
- `read`: View content and manage their profile.
For a complete list, refer to the WordPress Codex on Roles and Capabilities.
Real-life example: Imagine a food blog with a team. The editor ensures all recipes are formatted correctly, approving or editing posts from multiple authors. A contributor might submit a guest recipe, but it won’t go live until the editor reviews it. Meanwhile, subscribers can access exclusive recipes but can’t edit anything. This highlights the WordPress administrator vs editor distinction, where admins control the site’s backend, while editors focus on content.
How to Manage WordPress User Roles
Managing user roles is a core admin task in WordPress. Here’s how to handle it effectively, whether you’re adding users or tweaking roles.
Adding New Users

To add a user:
1. Log in as an Administrator.
2. Navigate to Users > Add New in the WordPress dashboard.
3. Fill in details like username, email, and password (or let the user set their password via email).
4. Select a role (e.g., Editor, Author) from the dropdown menu.
5. Click Add New User. The user will receive an email to activate their account.
This process is simple and ensures new team members get the right access level from the start.
Assigning and Changing Roles

To change an existing user’s role:
1. Go to Users > All Users.
2. Hover over the user’s name and click Edit.
3. Scroll to the Role dropdown, select the new role (e.g., from Contributor to Author), and click Save.
4. Alternatively, use bulk actions to change multiple users’ roles at once by checking their names and selecting a role from the top dropdown.
Regularly review roles, especially when team dynamics change, to ensure permissions align with responsibilities.
Using Plugins
For advanced control, plugins simplify role management. Popular options include:
- User Role Editor: Allows you to modify capabilities for existing roles or create new ones. For example, you could give an Editor the ability to manage categories but not plugins.
- Members: Great for membership sites, offering role management and content restriction features.
- WP User Manager: Simplifies user registration and role assignments for community-driven sites.
Plugins make how to manage WordPress user roles easier, especially for complex sites.
Creating Custom User Roles in WordPress
Sometimes, default roles don’t fit your needs. For example, you might want a “Designer” role that can edit themes but not publish posts. Creating custom roles is possible with plugins or code.
Using Plugins
The easiest method is a plugin like User Role Editor:
1. Install and activate the plugin.
2. Go to Users > User Role Editor.
3. Click Add Role, name it (e.g., “Designer”), and select specific capabilities.
4. Save and assign the role to users.
This approach is beginner-friendly and requires no coding.
Using Code
For developers, WordPress offers the `add_role()` function. Add this to your theme’s `functions.php` file:
php
add_role(‘custom_designer’, __(‘Designer’), array(
‘read’ => true,
‘edit_themes’ => true,
‘upload_files’ => true,
// Add or remove capabilities as needed
));
This creates a “Designer” role with specific permissions. Always test code changes on a staging site to avoid errors. For more details, check the WordPress Developer Resources.
Example: A business site might create a “Marketing” role that can edit landing pages and manage SEO plugins, but not touch the site’s core settings.
Best Practices for Managing Permissions
To keep your WordPress site secure and efficient, follow these **WordPress permissions guide** best practices:
- Limit Administrator access: Only give this role to essential personnel. Too many admins increase the risk of accidental changes or security breaches.
- Enable strong authentication: Use two-factor authentication (2FA) via plugins like Wordfence or iThemes Security.
- Assign roles based on need: Follow the principle of least privilege, give users only the permissions they need. For example, don’t make someone an Editor if they only need to write posts as an Author.
- Regularly audit users: Check Users > All Users to remove inactive accounts or update roles as team roles change.
- Use activity logs: Plugins like WP Security Audit Log track user actions, helping you spot unauthorized changes.
These steps ensure your site remains secure and collaborative.
Common Mistakes to Avoid
New WordPress users often make these errors when managing roles:
- Giving everyone admin access: This is a security nightmare. One wrong move (like deleting a plugin) can crash your site.
- Forgetting to update roles: If a contributor gets promoted to a full-time writer, update their role to Author to reflect their new responsibilities.
- Relying only on default roles: For complex sites, defaults may not suffice. Use custom roles to match specific needs.
- Not educating users: Team members might not understand their role’s limits, leading to frustration or accidental oversteps. Communicate clearly about what each role can do.
- Skipping backups: Before changing roles or installing management plugins, back up your site.
Avoiding these pitfalls saves time and protects your site’s integrity.
FAQs
What are the default WordPress user roles?
WordPress has five default roles: Administrator (full site control), Editor (manages all content), Author (edits and publishes own posts), Contributor (writes drafts), and Subscriber (reads content only).
Can I create custom user roles in WordPress?
Yes! Use plugins like User Role Editor to create roles with specific capabilities or add custom code with the `add_role()` function in your theme’s `functions.php`.
What is the difference between an administrator and an editor in WordPress?
An Administrator has full site access, including plugins, themes, and settings, while an Editor can only manage content (posts, pages, comments) without touching site settings.
How do I change user roles in WordPress?
Go to Users > All Users, click Edit on a user, choose a new role from the dropdown, and save. You can also bulk-edit multiple users for efficiency.
Conclusion
Mastering WordPress user roles and permissions is a game-changer for beginners. This Beginner’s Guide to WordPress User Roles and Permissions has covered everything from WordPress user roles explained to practical tips on how to manage WordPress user roles. By understanding the differences, like WordPress administrator vs editor—and leveraging tools like plugins or custom roles, you can keep your site secure, organized, and collaborative. Avoid common mistakes, follow best practices, and your WordPress site will thrive.
At 79mplus, we specialize in building secure, high-performing WordPress websites. Whether you need help setting up user roles or optimizing your site, we’ve got you covered. Contact us today for expert WordPress support and take your site to the next level!